Key Takeaways
- Original wood trim can be painted beautifully, but it needs better prep than newer trim because of old stain, varnish, grime, loose paint, and mystery coatings from previous owners.
- If your home was built before 1978, we check for lead concerns before sanding, scraping, or creating sanding dust.
- Oil based primer is often the difference-maker on stained wood trim because it helps with adhesion, tannin bleed, and durability.
Original wood trim has a way of making homeowners pause. It might be real woodwork from a house that has been standing for 80, 90, or 100 years. It might also be dark, orange, glossy, scratched, patched, or covered in an old finish that makes the room feel heavier than it needs to feel.
So the question is: can you paint wood trim white without ruining it?
Yes, you can. But original wood trim is not the same as painting a new piece of factory-primed trim from the lumberyard. Old trim has history on it. Sometimes that history is beautiful. Sometimes it’s dust, hand oils, cracked caulk, oil paint, latex paint, varnish, lead paint, stain bleed, and mystery layers from previous owners.
This is how we generally repaint original wood trim in older Milwaukee-area homes.
Should You Paint Original Wood Trim In The First Place?
Some original wood trim should probably be left alone or restored. If the stained wood is in great condition, fits the house, and gives the room its character, painting may not be the best first move.
But repainting trim makes sense in plenty of homes. Maybe the finish has gone orange and shiny. Maybe the dining room feels smaller because the crown molding, window trim, door trim, and baseboard trim are all the same heavy brown. Maybe the trim has already been partly painted white in another room.
Painting wood trim white can make an older home feel cleaner, brighter, and more pulled together. White trim can also make the wall color feel fresher and more intentional.
The catch is that bad prep can make good woodwork look cheap really easily. Thick coats of paint can bury crisp edges and poor primer can lead to peeling. Skipped repairs can make every old gap and nail holes stand out once the trim is painted white, too.
Our rule is simple: if we’re going to paint original wood trim, we treat it like a refinishing project, not a quick color change.
How We Repaint Original Wood Trim
0. First, We Look For Lead Paint Concerns
If a home was built before 1978 and the trim has old paint on it, we don’t start sanding casually. Older Milwaukee homes can have multiple paint layers, and some of those layers may contain lead.
Lead paint doesn’t always mean the trim has to be removed. In many cases, stable old paint can be handled safely and painted over with the right process. The risky part is disturbing it without a plan, especially through dry sanding, scraping, or careless cleanup.
We’ve written more about lead safety for Milwaukee homeowners, and it’s important on old baseboards, windows, doors, casings, crown molding, stair parts, and built-ins. If we see loose paint, chipping, or failing coatings, we slow down and handle the prep correctly.
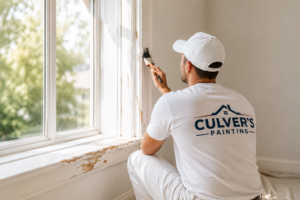
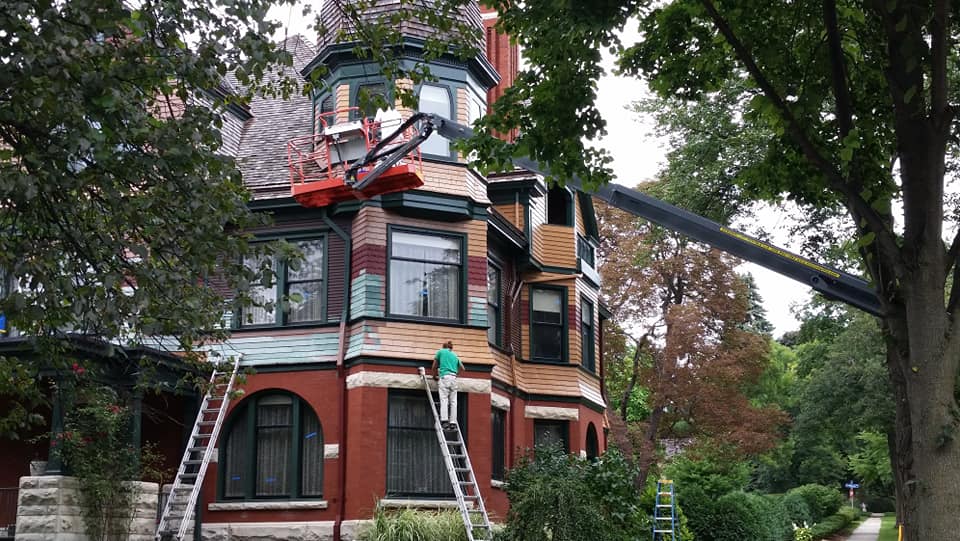
1. We Protect The Room Before We Touch The Trim
We protect hardwood floors, walls, glass, furniture, and nearby surfaces with drop cloths, masking, and painter’s tape where it makes sense. Original trim often sits close to old flooring, plaster walls, built-ins, and finished surfaces that deserve careful protection.
This is one of the reasons professional prep takes time. A clean setup makes a cleaner finish possible.
2. We Clean The Trim Thoroughly
Paint sticks to clean surfaces. Original wood trim can hold decades of grime.
Door casings collect hand oils while baseboards catch dust, pet hair, and floor cleaner residue. Kitchen trim may have a thin film of grease that is hard to see until new paint refuses to bond.
Before we start painting, we clean the trim with the right method for the surface. Sometimes that is a damp cloth or damp sponge or sometimes a stronger cleaner or deglosser is needed to remove oils and residue.
If you paint over buildup, the new paint may look fine at first, then chip or peel in the places that get touched the most.
3. We Scrape Loose Paint And Scuff Sand Glossy Surfaces
If the existing paint is loose, we remove the failing material carefully. Paint does not fix peeling paint. It only hides it for a little while.
Once the surface is stable, we scuff sand glossy finish areas so the primer can grip. Stain, varnish, polyurethane, oil paint, and old clear coats can be slick. Paint and primer need some tooth, especially on interior trim that gets daily contact.
Scuff sanding creates tiny scratches that help new paint bond without stripping the trim down to bare wood. The goal is adhesion, not destruction. We are not trying to erase the trim’s shape, flatten old profiles, or bury the details that make original wood trim worth saving.
After sanding, we remove sanding dust before primer or paint goes on. Dust left in corners, grooves, and crown molding can leave a rough finish and weaken adhesion.
4. We Repair Holes, Gaps, Caulk, And Damaged Edges
Stain hides more than people realize. Once wood trim turns white, cream, black, or another solid color, every flaw becomes easier to see.
Old nail holes look like little shadows, while dented corners and chewed-up baseboards pull attention away from the fresh paint.
Before finish paint goes on, we fill nail holes, repair shallow damage with wood filler or painter’s putty, sand rough patches smooth, and replace failed caulk where appropriate. We also let caulk cure before adding paint.
Caulk needs judgment, too. Not every old joint should be packed full without thinking. Some trim moves and some gaps need a better repair first. Some old-house quirks need a careful hand, not just more caulk.
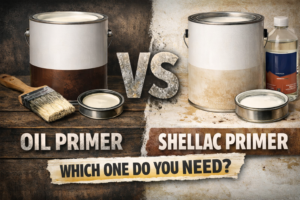
5. We Prime With The Right Primer
Primer is the part of painting wood trim that homeowners tend to underestimate.
On old stained wood trim or previously varnished wood trim, oil based primer often does the heavy lifting. It helps bond to difficult surfaces, blocks stains, slows tannin bleed, and creates a better base for the finish coat. Without the right primer, even expensive trim paint can struggle.
This matters on oak, pine, mahogany, fir, and other older woodwork. Wood tannins and old stain can bleed through water based paint and leave yellow or brown discoloration. Glossy clear coats can also create adhesion problems if the wrong primer is used.
A good primer does three jobs at once: it grips the old surface, blocks what might bleed through, and gives the top coats a smoother undercoat. We may use oil based primer, stain blocking primer, water based primer, latex primer, or another specialty wood primer depending on what the trim needs.
The point is matching the primer to the surface in front of us. We broke down that decision more in our guide to oil primer vs shellac primer.
6. We Sand The Primer And Apply Durable Trim Paint
Primer makes flaws easier to see. That can be frustrating, but it is useful.
After primer dries, we lightly sand to knock down raised grain, dust nibs, brush marks, rough filler, and small imperfections. Smooth primer gives trim paint a better surface and helps the finished woodwork feel clean instead of lumpy.
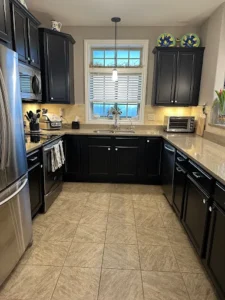
Then we apply a durable trim paint using a sprayer or hand-painting, depending on the situation. The best paint for interior trim is usually an acrylic paint made for woodwork, doors, and cabinetry-style surfaces. Semigloss paint is common because it is durable and easy to clean. Semigloss also gives white trim that crisp, classic look. Satin can work well when a homeowner wants a softer sheen.
Modern water-based paint and waterborne alkyd products have improved a lot. They level well, clean up easier than oil-based paint, and still provide good durability. In most homes, we do not need oil paint as a finish coat.
For more on that distinction, see our post on oil paint vs latex paint.
Most original wood trim needs two coats of paint for even color, consistent sheen, and better durability. One coat rarely gives the best result, especially when painting wood trim white over a dark stain or old color.
Should You Paint Walls Or Trim First?
There are two ways to handle the order.
Many painters paint walls first and trim last because painter’s tape can help protect the fresh wall paint. That can work well in some rooms.
We often like painting trim first when the room is getting a full interior painting project. Cutting the line between trim and wall is usually easier when the final cut is made on the wall, not the trim. This can create a sharper final line, especially where a new wall color meets white trim.
Common Mistakes When Painting Original Wood Trim
The most common mistakes are shortcuts.
Painting over glossy varnish without scuff sanding can cause peeling.
Skipping primer can allow stain bleed, poor bonding, and uneven sheen.
Using the wrong primer over stained wood can leave yellow or brown discoloration under the finish coat.
Too much paint is also a problem. Original wood trim often has small profiles, grooves, and edges that make it look good. Heavy coats of paint can fill those details and leave the woodwork looking rounded, thick, and cheap.
A careful trim project protects the details instead of burying them. This is one reason older homes and Victorian home painting services require more patience than a basic repaint.
Thinking About Repainting Original Wood Trim?
If your original trim feels too dark, too worn, or too beat up, we can help you figure out whether painting makes sense and what it would take to do it right.
Culver’s Painting works on older homes throughout the Milwaukee area. From trim and walls to kitchen cabinet painting, we can help you protect the character of your home while giving the wood trim a clean, durable finish that fits the room better.
Reach out for a free estimate, and we’ll take a look before anyone opens a paint can.
Quick Answers To Common Wood Trim Questions
Can you paint over painted wood trim?
Yes. You can paint over painted wood trim if the existing coating is clean, dull, and firmly attached. Glossy or damaged surfaces need more prep.
What happens if you paint over old paint without sanding?
If the old paint is glossy, dirty, or slick, new paint may not bond well. You may see peeling, chipping, uneven sheen, or early wear around high-touch areas.
Do you need to prime painted trim before repainting?
Sometimes. If the trim is clean, dull, and close to the same color, primer may not be needed everywhere. If you are covering stains, bare wood, glossy varnish, dark colors, or problem areas, primer is the safer choice.
Is painting wood trim white a good idea?
Painting wood trim white can brighten a room and make older interiors feel cleaner. It is a good idea when the existing trim is damaged, too dark, mismatched, or already partly painted. It may be a bad idea if the original stained wood is a major historic feature in great condition.