Let’s talk about popcorn ceilings. You know, those lumpy, bumpy ceiling surfaces that were all the rage decades ago but now feel like the home design equivalent of shag carpet.
Whether you call them acoustic ceilings or stipple ceilings, their quirky popcorn texture once had its moment but has since fallen out of favor.
So, how do professional painters tackle popcorn ceiling removal safely? Let’s dive in.
Key Takeaways
- Once a quick and cost-effective solution for noise reduction and hiding imperfections, popcorn ceilings now feel outdated and difficult to clean. Many older ones also pose health risks due to asbestos content.
- Before tackling popcorn ceiling removal, test for asbestos (especially in homes built before the 1980s). Protective gear and room preparation—like covering floors and furniture with plastic sheeting—are essential to avoid mess and hazards.
- While DIY removal can save money, it’s labor-intensive and risky without the right tools or experience. Hiring professionals means safety, efficiency, and a flawless finish, making it a smart choice for many homeowners.
A Brief History of Popcorn Ceilings
First things first, where do they even come from?
Popcorn ceilings burst onto the home design scene in the mid-20th century, with their popularity peaking between the 1950s and 1980s. They offered a quick and affordable way to cover imperfections on ceiling surfaces, so they naturally became popular quickly.
Beyond aesthetics, popcorn ceilings had practical benefits. The textured finish helped to dampen sound, making them especially appealing in multi-story homes or apartment complexes where noise control was a concern. Saving time and labor costs was an extra boon. The trend hasn’t aged well. The introduction of the Clean Air Act in the 1970s revealed a darker side to these ceilings: many contained asbestos, a hazardous material linked to serious health problems. Once asbestos became a regulated substance, popcorn ceilings started losing their charm.

What Is a Popcorn Ceiling, and Why Should You Remove It?
Assuming you’re out of the loop: popcorn ceilings are heavily textured ceilings with a rough, uneven finish that vaguely resembles cottage cheese. They’re created by spraying a mixture of materials —like foam or stucco— onto the ceiling surface to add dimension and reduce noise.
So what about a popcorn ceiling would make you want to remove it?
- They’re dated and can make your space feel stuck in the past.
- Cleaning them is a messy task, as dust and cobwebs cling to the popcorn texture.
- If your home was built before the Clean Air Act of the 1970s, your popcorn ceiling may contain asbestos, leading to serious health problems.
And while removing popcorn ceilings can be tackled as a DIY project, safety concerns like asbestos testing and proper protective equipment often make professional removal the safer, smarter choice. Professional painters like our team bring the tools, training, and experience to handle this job while keeping risks to a minimum (plus, they can do your entire ceiling in a few minutes!)
Safety First: Things to Know Before Removing Popcorn Ceilings
Before grabbing your tools, take a moment to consider potential safety hazards, as well as how to prevent them.
- Homes built before the 1980s may have popcorn ceilings that hide asbestos. Have your ceiling tested to confirm it’s asbestos free.
- Protect yourself: a dust mask, eye protection, plastic sheeting and gloves are essential to guard against falling debris.
- Cover the entire room with plastic sheeting. This will protect floors, furniture, and walls while keeping the mess contained.
While a DIY approach can save costs, hiring a professional ensures that there’s no chance of any harm coming you or your family’s way (especially for older ceilings where asbestos or lead paint may be a concern). For peace of mind, many homeowners opt for professional popcorn removal services.
Prepping Your Space for the Big Job
Nobody wants their furniture or floors ruined by this messy task, so prep work is key.
- Remove furniture and cover all the carpet with drop cloths or plastic sheeting to prevent damage. Don’t forget electrical outlets!
- Use painter’s tape to secure edges where walls meet the ceiling to keep dust confined.
- Wear gear like goggles, a dust mask, and gloves, especially if dealing with an existing ceiling that hasn’t been tested for asbestos.
Popcorn Ceiling Removal Methods and Tools
There are three go-to methods for removing popcorn ceilings: scraping, drywalling, and skim coating. Let’s breakdown the basics:
- Scraping: You’ll need a drywall knife, a sturdy putty knife, and a spray bottle or pump sprayer filled with warm water to dampen the texture for easier removal.
- Drywalling: This involves attaching new drywall panels right over the existing ceiling for a fresh start. You’ll need drywall sheets, screws, and joint compound for this approach.
- Skim Coating: Smooth the surface by applying drywall mud right on top and sanding once dry.
How to Scrape Away a Popcorn Ceiling
Scraping is the most common method, mainly because it’s cheaper and more practical. The best way to do it is to start small and work methodically:
- Lightly mist a small section with warm water from your spray bottle or garden sprayer. This helps soften the popcorn texture for easier scraping. It’ll also make it so you don’t inhale as much particulate, though it’s certainly no fix compared to wearing a high-quality mask or respirator.
- Use a drywall knife or putty knife and start scraping at a slight angle to remove popcorn in controlled swipes.
- Be gentle to avoid gouging the room ceiling underneath.
- After scraping, use a hand sander to smooth rough patches before applying ceiling paint.
If scraping feels overwhelming, or if you’re dealing with a whole ceiling that’s been painted, professional removal might be your best bet. Experts have specialized tools and techniques to handle even the toughest jobs with minimal mess.
Finishing Touches for a Flawless Ceiling Paint Look
Once finished, inspect the ceiling for cracks or blemishes. There are a few ways of finishing up:
- Fill in gaps or imperfections with joint compound and let it dry completely.
- Apply a layer of primer to create a uniform base.
- Top it off with a fresh coat of ceiling paint, and voila! Your ceiling is smooth and ready to shine.
The Cost of Removing Popcorn Ceilings
How much will this makeover set you back?
That depends on a few things, but you could be looking at well over $1,000 for proper asbestos abatement.
Pro Tip: What Is Asbestos Abatement?
Asbestos abatement is the process of safely removing, repairing, or sealing materials that contain asbestos to prevent harmful exposure. Professionals handle this by testing for asbestos, sealing off the area, removing or encapsulating the material, and then guaranteeing safe disposal. It’s necessary in some older buildings, especially during renovations, as asbestos fibers can cause serious health risks like lung disease and cancer. Always hire licensed experts—improper handling can make things dangerous.
Considering Hiring Professionals?
We get it. While removing popcorn ceilings can be an achievable DIY project, not everyone wants to spend a whole day getting covered in bits of paint and ceiling popcorn. Worse, ceilings may also contain asbestos, posing serious health risks without proper handling.
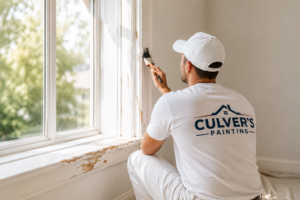
Professionals like the team at Culver’s have the tools and expertise to ensure safety and minimize disruption during the process. Depending on your priorities, it might simply make sense to have someone take over for you. If you’ve got questions about painting in Milwaukee or asbestos removal and paint perp, give us a call any time.