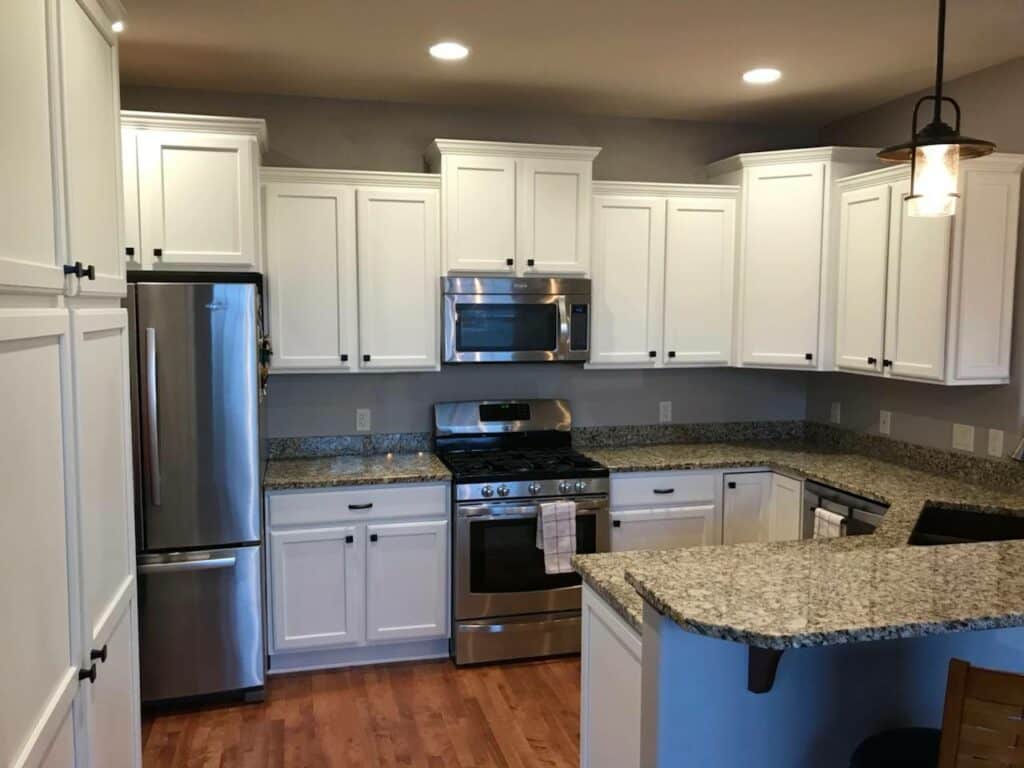
Painting kitchen cabinets has gone mainstream over the last decade as a cost-effective way to dramatically change and improve the look of your kitchen without breaking the bank.
High-quality cabinetry for a kitchen renovation can be incredibly expensive – even small kitchens can begin at $15,000 for custom cabinets alone – while professional cabinet painting can be done for a few thousand dollars! Further, many homeowners opt to paint their own kitchen cabinets, bringing the cost down to the price of paint and a little elbow grease.
If you’re considering painting your kitchen cabinets, the Milwaukee painting pros at Culver’s put together this short cabinet painting guide to help you create a killer kitchen – and avoid some of the most common cabinet painting pitfalls.
How To Paint Kitchen Cabinets Like a Pro
There’s more than one way to paint kitchen cabinetry, but with over two decades of experience helping homeowners transform kitchens with fresh paint, we’ve learned a thing or two about the best way to paint cabinets.
Here’s the reality: the best way to paint kitchen cabinets is probably with the help of professional painters.
It’s not that you can’t do it, it’s that professional painting teams have the right equipment and technical tools to create beautiful – and most importantly, durable – painted kitchen cabinets.
1. Remove cabinet doors, drawer fronts, and hardware
While you might be tempted to paint your drawer fronts and doors in place – stop.
When we tackle any cabinetry paint job, everything comes off: door and drawer pulls, doors and drawers, and hinges. Anything that could get in the way of paint comes off. When we can, we even remove each glass pane from glass cabinet fronts!
All doors and drawer fronts then leave your home and come to our shop where we have a dedicated spray booth designed to spray cabinets.
A crucial step that many DIY homeowners miss is proper labeling. Every piece of hardware must be labeled to be reattached to the same point where it came from. And, every door and drawer front must go back where it came from.
When your hardware is all the same, or drawers are all the same size, why does it matter?
Hardware used repeatedly over the many years (or decades) that your cabinetry has been in place tends to “hang” a certain way.
Every hinge performs just a little differently after years of use, and putting them right back where they started is key to avoiding wonky doors and scraping or sagging drawers. The same goes for door and drawer fronts; wood changes over time, and returning each piece to its original location will eliminate a lot of hangups.
2. Clean and tape off cabinet boxes
Every part of your kitchen cabinets that will be getting paint gets a good cleaning to remove old food, grease, cooking oils, and any debris that may have built up over the years. That includes the doors and drawer fronts headed to our shop, as well as the cabinet “boxes” that remain in the kitchen.
We then thoroughly vacuum the area to eliminate any dust that might get kicked up during the project.
Because we apply cabinet paint with a professional sprayer – which is what allows us to achieve that factory finish you expect on new cabinets – we tape and apply plastic to your kitchen walls, trim, and flooring where overspray might occur. We also mask off all cabinet openings (remember we are taking your doors offsite) to spray your kitchen boxes properly.
3. Everything gets sanded
If you’re wondering how to paint kitchen cabinets without sanding – don’t.
Painting cabinets without sanding will likely result in poor paint adherence and faster wear-and-tear on your beautiful new cabinets.
Painting prep work, including sanding, is critical when painting over old paint or finish. Sanding the surface creates a slightly rougher surface (called “tooth”) for new primer and paint to adhere.
If you’ve ever painted trim in your home and seen it nicked and scraped a year later, you know the risk.
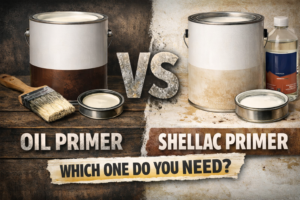
4. Your cabinetry gets primed with an oil-based primer
After all of your cabinet boxes and fronts are sanded, every surface to be painted receives a powerful oil-based primer.
This undercoat is key to longevity, providing a “tooth” for the top coat to adhere to and sealing in the older paint or finish. A commercial oil-based primer is particularly important with stained wood cabinets and those with a polyurethane finish.
We sand the primer lightly after this coat, again creating a quality tooth for paint to grab.
5. Cabinets receive first coat of paint and are sanded again
For your cabinet doors and drawers, we apply a first layer of your finish paint in our dedicated cabinet painting booth at our shop.
With your kitchen thoroughly taped off, we also apply a first coat to the cabinet boxes.
After this first coat, the cabinets again receive a light as needed if any imperfections are noted.
6. Cabinets receive final paint topcoa
Your cabinetry is ready for its final coat of paint with our professional spraying equipment.
Why do we use a sprayer?
A professional paint sprayer achieves an incredible look and finish, much like the factory finish you’d hope for when ordering brand new cabinets. You’ll see no brush marks, and no stippling – the tiny dimples you may be familiar with from rolling paint.
Done professionally by experienced painters, your cabinets will have a truly beautiful, uniform, and durable look and finish.
Bonus Trim and Cabinet Painting Tip
A pro painting tip: when painting cabinets that were previously stained or natural (no paint), you’ll need to pay attention to gaps in the wood and finish nail holes. Your first coat of primer will immediately show all of the old nail holes that may have been hidden by stain in the past! These nail holes will need to be filled, and you’ll need to caulk old gaps that are now exposed as well. This is a nuance of painting both cabinets and trim in old homes.
7. Doors, drawers, and hardware go back in the same location
With the paint dry, we return your doors and drawers to the home and begin putting it all back together.
This is where early labeling becomes so worthwhile: we put your doors and drawer fronts back exactly where they came from with the same hardware.
Many of our customers are interested in changing drawer knobs and pulls at this time, which is just fine with us! We know that updating hardware can be a critical part of updating the look and feel of your kitchen. The only thing to keep in mind is to make sure your knobs or pulls match the exact size of the holes of your previous hardware.
So, How Much Does It Cost to Paint Kitchen Cabinets Professionally?
Our kitchen cabinet painting projects typically cost $4,000 – $6,500.
A simple rule of thumb is to expect around $120-150 per “front”, or each door or drawer in your kitchen. A kitchen with 15 drawers and 15 doors will be close to $4000- $4500. Keep in mind this includes all the doors, drawers and the cabinet boxes themselves. We can also paint the kitchen walls and ceilings for a small additional cost as well. This also includes the cost of paint, primer, labor, etc. It is all-inclusive.
“Can I just paint my kitchen cabinets?” you say.
Of course, and with the right process, it can turn out great!
But we’ve also seen enough botched cabinet painting projects and redone enough DIY kitchen cabinet paint jobs to know that mistakes are common and easy to make. If you’re rolling and brushing your cabinets, you may see those brush marks, and without close attention to detail in prepping (repeat sanding and a good primer), you may be disappointed with the scrapes and dings in your paint with normal family kitchen traffic.
Frequently Asked Questions About Painting Cabinetry
Can you paint oak cabinets without the grain showing?
Deep wood grains that were common in the 70’s through the 90’s can be challenging to cover with paint alone. A high-quality primer can help, and in some cases, we do more extensive sanding to eliminate finishes that may accentuate that grain before we apply paint. The right primer can also help hide deep grains.
How long does it take to paint kitchen cabinets?
Our team typically finishes a kitchen cabinet painting project in four days.
But that’s with an experienced team and all of the right equipment; it may take the weekend warrior a lot longer than that if you’re taking the right precautions and steps in the process.
Do I need to strip cabinets before painting?
For some natural, stained, or finished cabinets, we sand them entirely before applying paint.
Most cabinets that are already painted will be fine with a good sanding.
Can you paint kitchen cabinets without sanding?
Sure, but we wouldn’t recommend it.
Sanding your cabinets before painting is crucial to getting a new coat of paint to adhere well. This is particularly important with older stained or polyurethaned cabinets, which are notorious for scratches and chips if not finished properly.
Final Cabinet Painting Tips
- Darker colors take longer to dry and tend to remain stickier for longer. If you’re going dark, plan for a little extra drying time.
- Sand, sand, sand! We can’t emphasize enough the importance of a good base surface to ensure a quality finish.
- Watch for nail holes!
- We recommend a satin sheen as opposed to a semi-gloss sheen for your top coat. Semi-gloss is very reflective and will also show any small imperfection. Cure time is also longer with semi-gloss paints. 95% of our cabinet paint jobs are done with a satin sheen. Pro Classic or Emerald Urethane from Sherwin Williams are the paints we recommend for cabinets. These products are designed for interior woodwork and cabinetry.
If painting your cabinets sounds like a mess, or you just have a time crunch, Culver’s Painting can help. We’ve been painting cabinets for over a decade, and our team has the right equipment and experience to make any kitchen shine again. Call or get in touch to learn more and get a free quote.